Adventure Creation Quickstart Guide
Welcome to the Adventure creation quickstart guide! If you're hoping to get your feet wet learning how to create an Adventure, you've come to the right place. Following the 10 steps below, you'll have a simple Adventure up and running in no time!
While we aren't going to cover any particularly advanced mechanics in this guide, we'll cover more than enough to get you on your way making Adventures on par with the Quest for the Icy Soul roleplay event.
Step 4: Structure
Now it’s time to create the scaffolding that will hold our Adventure together. We’ll split it into two nodes, one for each stage of our Adventure. Each of these nodes will contain their own commands and encounters. In this guide we’ll fill in the structure for each node separately for the sake of keeping the steps small, but you could do this all in one go if you wanted to.
Click on “Adventure” at the very top of the sidebar to the right in order to get back to your Adventure’s central hub, which is where you can edit your Adventure’s structure.
In the Adventure structure editor, your Adventure as it exists now is shown in grey, and any staged changes are shown in color. As you follow the instructions below, notice that everything you create will be green, indicating that you are creating new elements. These elements will turn grey when you commit your changes, indicating that they are now part of your Adventure.
4.1: Stone Cell
Recall our what our planning sheet looked like. We’ll be using encounters to provide us with the random outcome of searching the cell: when an encounter is triggered, you get a random encounter that you haven’t gotten yet, so it’s a good way of introducing some randomness without getting stuck with the possibility that the Adventurer will “find nothing” repeatedly.
Only commands can modify Adventure state, so we’ll need four commands: one to trigger the “find something” encounters, one to try the door, one to acquire the key, and one to move the second node. Only the first two should be directly available to Adventurers, but we’ll worry about that later.
Instructions
In the ‘Stone Cell’ box:
- Use the ‘New command’ field to create commands
look,collect key,keyhole, andadvance - Use the ‘New encounter’ field to create commands
find nothing,find lizard, andfind key(we’re not using encounter pools, so leave the “Optional pool” field blank)
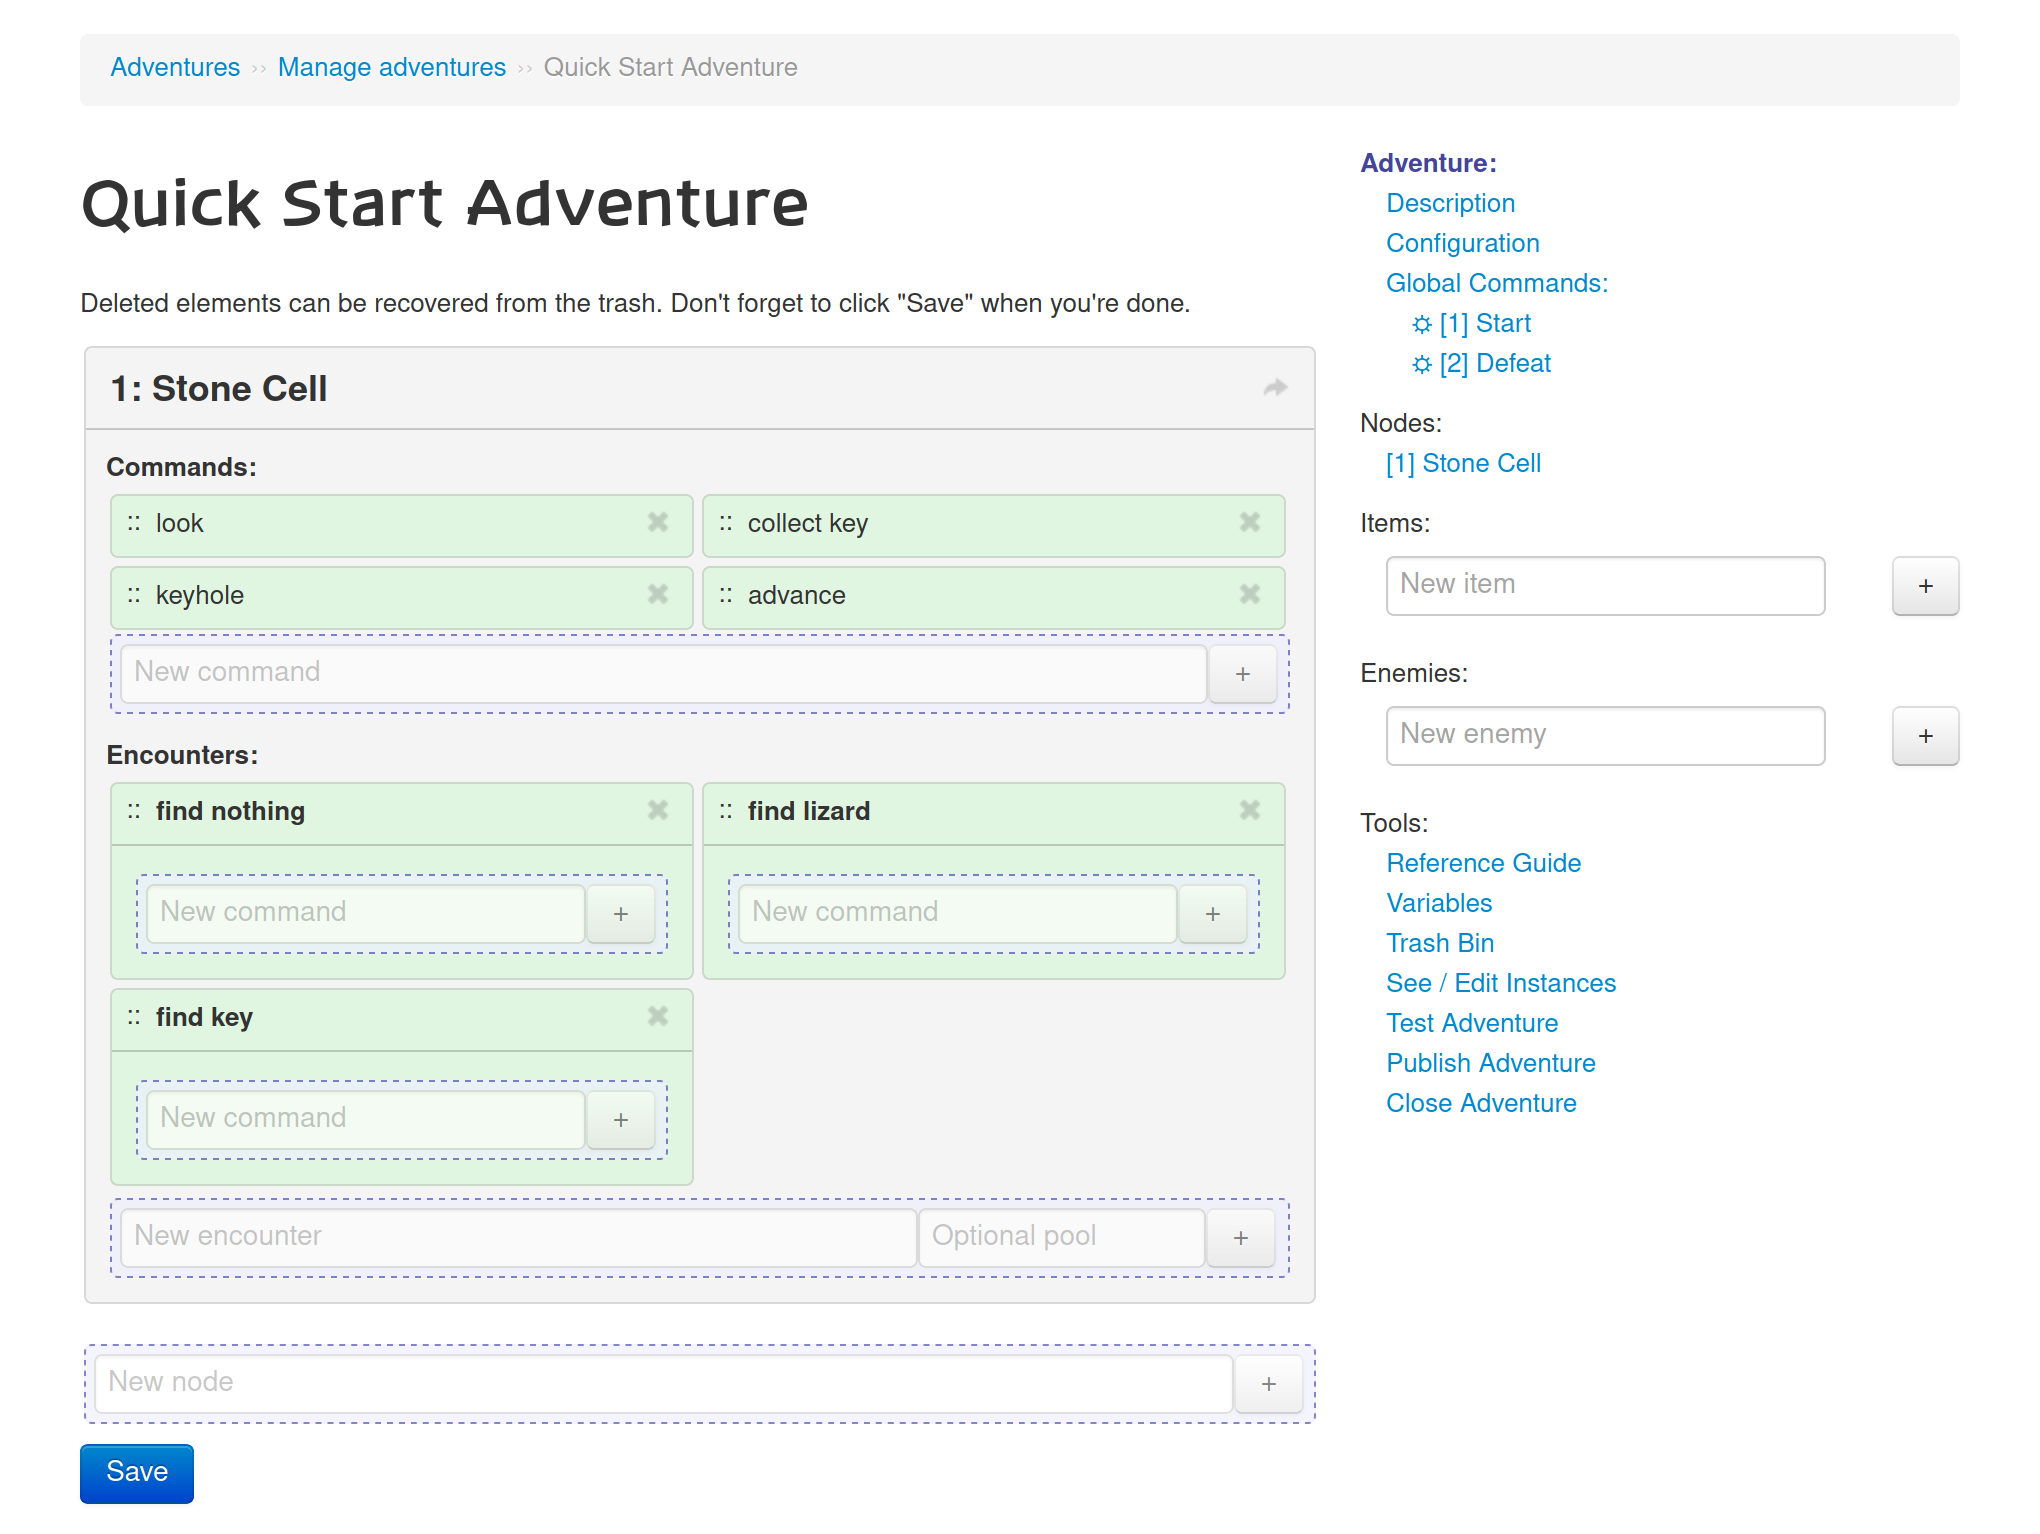
Click “Save” to commit the staged changes. Notice that the green fields will turn grey, and that commands will receive a numbered prefix.
4.2: Hallway
Looking again at our planning sheet, the second stage of the Adventure is a lot simpler. We need two commands: one to trigger the traps, and one to end the Adventure. For the traps, we’ll use a traditional encounter, where all participants must resolve it individually by deciding whether to try to get past the traps being fast and nimble, or by being slow and careful.
Instructions
- Use the ‘New node’ field to create a node called
Hallway - In the ‘Hallway’ node, use the ‘New command’ field to create commands
hallwayandend - In the ‘Hallway’ node, use the ‘New encounter’ field to create an encounter
traps - In the ‘traps’ encounter, use the ‘New command’ field to create encounter commands
fastandslow
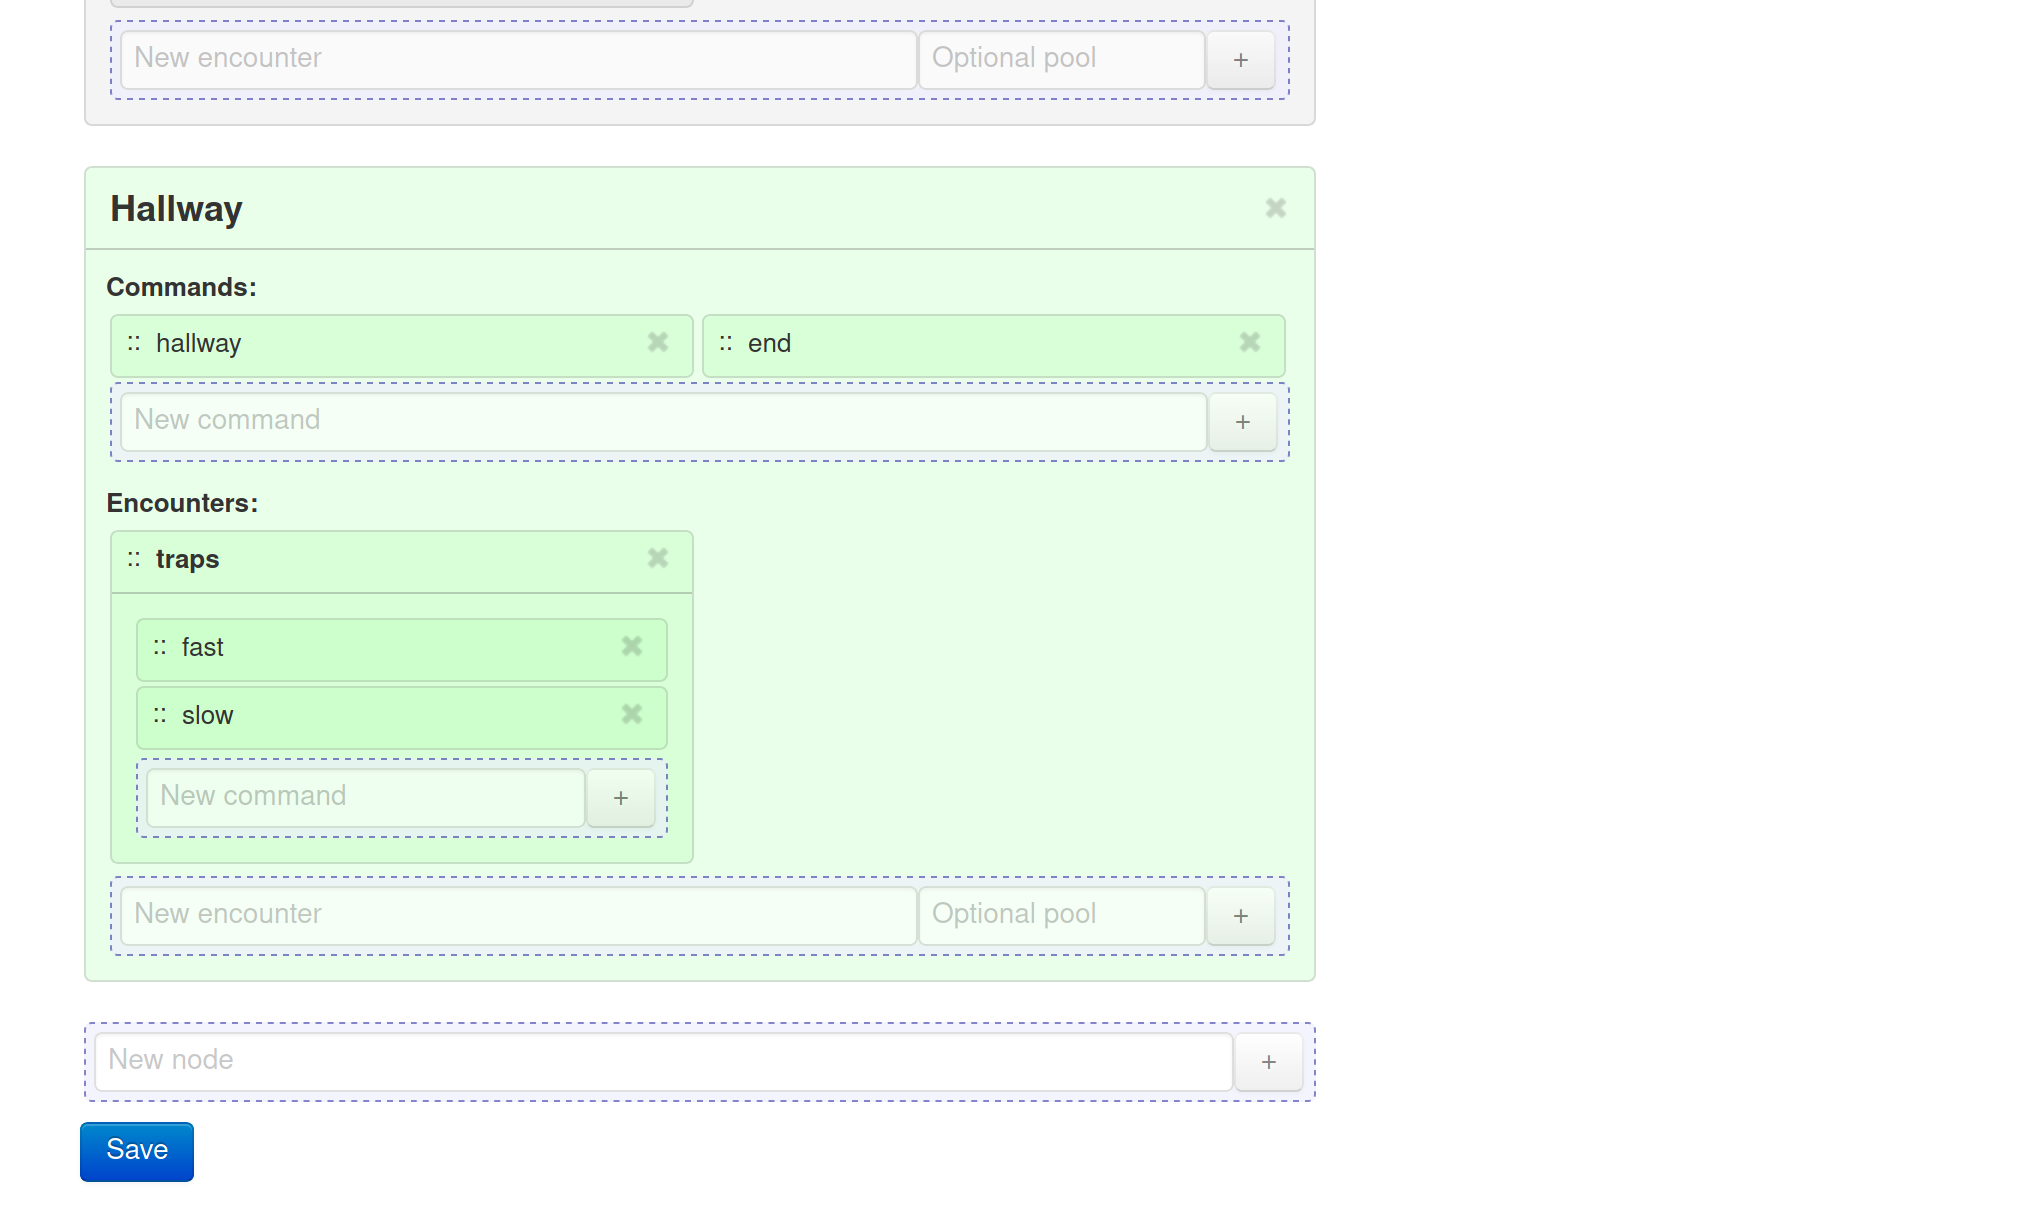
Click “Save” to commit the staged changes.
You’ve just finished laying out the structure of the entire adventure. Next stop: setting up our items and enemies.
When you’re ready, head on over to Step 5: Items and Enemies.