Adventure Creation Quickstart Guide
Welcome to the Adventure creation quickstart guide! If you're hoping to get your feet wet learning how to create an Adventure, you've come to the right place. Following the 10 steps below, you'll have a simple Adventure up and running in no time!
While we aren't going to cover any particularly advanced mechanics in this guide, we'll cover more than enough to get you on your way making Adventures on par with the Quest for the Icy Soul roleplay event.
Step 1: Adventure Planning
It’s tempting to dive right in and start building, especially because a few days of building can save you literally hours of planning, but we’re going to take a moment to map out the structure of what this Adventure is going to look like.
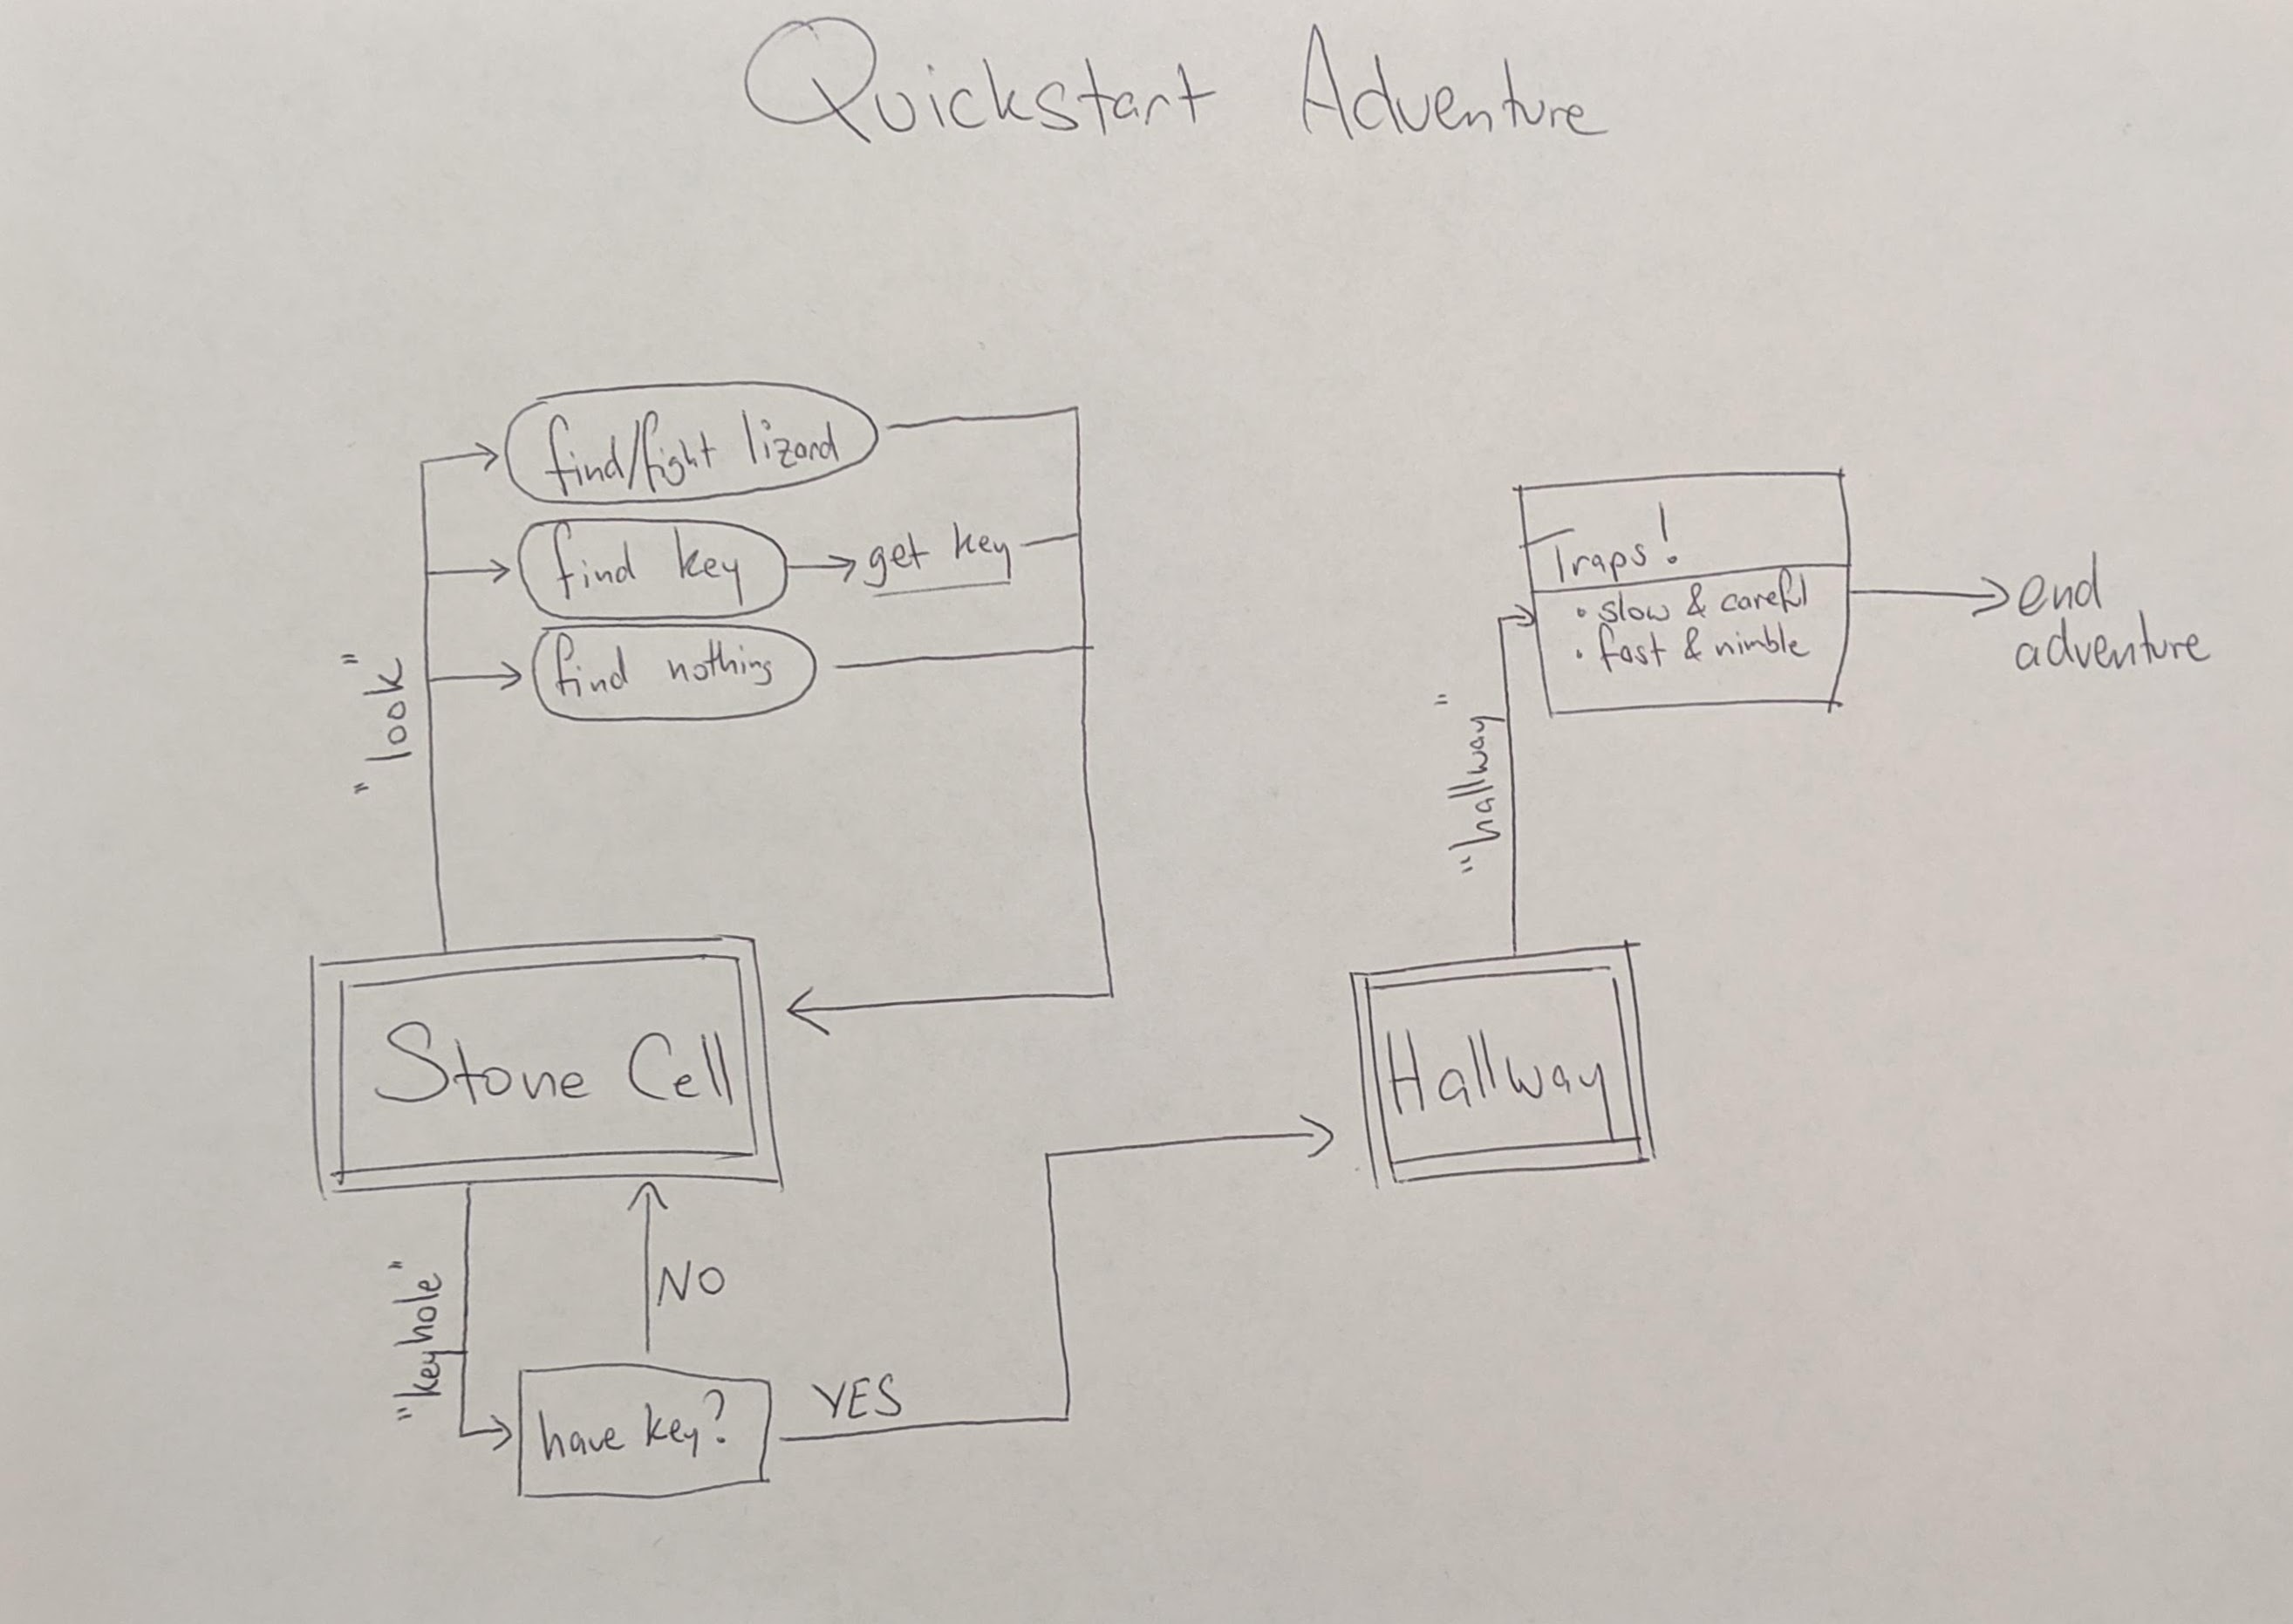
In the first stage of this Adventure, you find yourself locked in a cell. There’ll be a locked door, and before you can open it you’ll need to find the key. When searching the cell for the key, you’ll find it eventually, but it’s possible you may end up fighting a ferocious lizard in the process. Once you have the key, unlocking the cell door will bring you to the second stage of the Adventure.
In the second stage, you find yourself in a hallway leading to the exit. But there are traps! You (and every adventurer with you) will need to attempt to evade the traps while crossing the hallway. Once you have done so, they may escape and end the Adventure.
The overall structure will look like this:
Some Terminology
We’ll quickly run through the terminology of the things we’ll use when building this adventure. Give it a quick read-through to get an idea of what these words mean, but don’t worry too much if it doesn’t all make sense yet. You’ll get a much better idea of how all this works over the next several steps as we build out an adventure together.
The fundamental building block of adventures is the COMMAND: commands may be executed when creating a post in an adventure thread, and are responsible for interjecting new posts and changing adventure state. They operate by executing a pre-programmed sequence of ACTIONS, which are like Lego-blocks of functionality that you can use to piece together what you want the command to do. Commands can be grouped logically into NODES, which are sort of like “folders” for commands. When an adventure is in a particular node, adventurers have access to commands that belong to that node.
Nodes may also contain ENCOUNTERS, which are events that happen to the adventurers and need to be resolved. For example, adventurers may encounter a slippery log, and each adventurer may attempt to cross the log without falling. Encounters typically involve a random element, and are triggered by a command action performed by an adventurer. They contain their own encounter commands, which need to be executed by all adventurers in order to resolve the encounter. While an encounter is active, only its encounter commands are available to the adventurers.
An adventure may define ENEMIES that present a battle to the adventurers. If an encounter specifies an enemy it becomes a BATTLE ENCOUNTER, in which the enemy must be defeated or fled from in order to resolve. During a battle encounter, COMBAT MECHANICS are engaged: attack / flee commands are available in addition to any encounter commands that may be defined, and adventurers pit their martial strength against that of the enemy.
Finally, an adventure may also define ITEMS that adventurers can collect. There are four types of items: weapons, armor, usable, and misc. Weapons provide additional attack commands for battle encounters, allowing adventurers to do more damage. Armor makes adventurers more difficult to hit. Usable items are items that can execute their own internal mini-commands, which can be used to construct items like health potions, fireball scrolls, etc. Misc items don’t really do anything besides register being owned by an adventurer, and can be used for things like keys or talismans.
Great! You now have an idea of what we’ll be building together, and what the various words mean that we’ll be using throughout this guide.
When you’re ready, head on over to Step 2: Basic Setup.