Please post all chit-chat in the Discussion Topic, and restrict posts in this topic to recipe submissions only.
You have until Sunday, May 3rd at 23:59 ST to post your entry. For this event, minimum participation constitutes of posting the ingredients, instructions, showing you have made a clear effort to Mycenify it and giving us proof that you have made this recipe before. Proof can be in the shape of a photograph of the dish including your username in the picture, or alternately if you do not have access to a camera, providing another creative way that proves to us you have actually made the dish before.
Ingredients:
~About ten or so white mushrooms. Let’s say two cups if you want to be exact
~All the spices you like. Meesh suggests: Thyme and Rosemary.
~A sprinkle of salt
~Pasta
~Vegitable Oil
~OPTIONAL: A large tomato, a quarter piece of onion, and a handful of your favorite cheese
Instructions: Cooking time: 15 minutes
2. Chop up the mushrooms into slices.
3. Pour a little bit of oil onto a frying pan and put it on the oven on a medium flame. If you have onions, chop them up into little pieces and stick ‘em in the pan.
4. Add the mushroom to the pan. If you have the tomatoes, chop those up and add them in.
5. Sprinkle all your favorite spices into the mix. I have my preferences, but don’t be afraid to go crazy here. Add a little salt too
6. The mushrooms should be frying up and smelling DELICIOUs right now. They won’t take very long until they’re the perfect brown color to nom, so in the meantime, you should be boiling water with pasta in it.
7. Once the pasta and the mushroom swamp is ready, pour the pasta in a bowl and shovel all the mushrooms on top of that. Then mix it all up. For a final step, you can (optional) shred some cheese over the whole mess. Meesh’s sister prefers that babybell red cheese thing, but Meesh prefers cheddar.
8. You COULD eat it…or you can just call Meesh on your phone and she’ll come over to eat it for you.
“Chop chop chop, chop chop chop.” Whiz sang her song joyously as she danced around her witches pot. “In they go, one two three! Chop chop chop, chop chop chop!” Slices of pondshrooms and driftshrooms and changingshrooms of all sorts went flying into the pot, the perfect witches recipe. “Bubbles and bugs and brains, oh my!” Whiz cackled. A handful of slimey, wriggly, noodly worms was set aside in a separate cauldron, where they were boiling in the bubbling green water. Whiz cackled, long and loud, as she tossed pawfuls of spices into the cauldron containing the chopped up changingshrooms. Powered mouse and the sands of time, and just a pinch of salted drasilis. When all the driftshrooms and pondshrooms had turned a lovely golden brown color, Whiz cackled.
“Oh, they’ll never know just what they’ll become.” she shrieked gleefully, carefully pouring the water out of the pot of boiling worms. The worms, she put on a plate, and for a final touch, she added the fried ‘shrooms, a delightful smelling mix of this and that. Transformative mushrooms fille dthe mix, but what kind? No one could know! Now, the final step!
“Come in, my pretties!” Whiz opened her door, and ineki of all kinds ran in. Everyone knew of the witch’s amazing cooking. “Chop chop chop!” she sang, doling out bowls of the mysterious stuff to her new visitors. As Ineki took bites of the witch’s creation, magic and mayhem insued. Fur turned all manner of different colors. Cat ineki grew third tails, and some Fox Ineki lost two of theirs. In one case, a Drasilis yelped as he found himself covered in spikey orange fur. Whiz cackled in delight. “Let the magic begin!”
DISCLAIMER: Eating real Mushroom Swamp does not, in fact, turn you into an Ineki!
Well I’m in college now and so there’s no cooking here for me, so let me tell you the story of the first time I made mushroom swamp. When I was growing up, my sister and I were often left at home alone a lot. My parents had to work long hours, so when we came home it was just my sister and I. She was six years older than me and by then old enough to use the oven on her own, as well as watch me without our needing a sitter. We went to different schools, but we got home around the same time, and she would then make us something to eat. The problem? She only knew how to make HER favorite foods. This included this mushroom recipe, which was entirely her invention. I would help her make it sometimes, but my sister was the expert.
NOTE: The recipe my sister always made included both tomatoes and onions. I /hated/ cooked tomatoes and onions of any sort. I would whine a lot for her to not include those, so I know for a fact this recipe is possible to make (and just as good!) with or without these ingredients.
One day, my sister got pretty sick and stayed home from school. When I came home from my own classes, I wanted to do something to make her feel better. So I decided to try and make her favorite mushroom swamp recipe. I had never made it without her before, so of course it turned out HORRIBLE. I left a lot of tomato juices in there, so at the bottom of this pan was a sopping, goopy mess. The mushrooms were terribly undercooked, and I think I confused what spices I was supposed to put in…it was bad. (Not to mention I technically was still too young to be allowed to use the oven by myself *shifty eyes*). But I was so proud of it. I brought it up to my sister in bed, and that poor thing actally humored me enough to eat every bite of it, telling me it was delicious. Because of the goopy bubbling mess that my first attempt resembled, we decided to name her recipe ‘Mushroom Swamp’
Well, needless to say, I was young. My ego inflated by a LONG shot and I started making mushroom swamp more and more, until I was almot as good as she was. Now I’m 19 and she’s 25, and I have to say my mushroom swamp is one of my /favorite/ things to make and to eat. It takes about five minutes, it’s easy enough that my fourth grade self could do it, and it’s full of good memories.
I don’t know if this fully qualifies as ‘proof’ of my making it - it’s just a story, after all - but I think you’ll be hard pressed to find this recipe anywhere online. It’s my sister’s middle school/high school invention, and by no means anything a chef would serve ^^;.
Instructions: Cooking time: 30 seconds unless you’re out of ice
1. Put ice into old fashion glass
2. Add bourbon
I have invented a dance you can do with the drink. You take the arm movement of lifting a glass to your lips and repeat this until you decide to stop. It goes very well with all music.
Furthermore, I have it on good authority that this drink has helped in the creation of parts of Mycena Cave.
I’m going to abuse being a staff here and approve that I have made this before. I would also like to submit glitch and Myla as witnesses.
There is two ways to make this, the cheap way and the more ‘expensive’ way. Obviously, it depends on what you have on hand. Both ways are just as tasty, one just happens to have more goodness within. The brackets denotes the better version.
Ingredients -
2 boxes of Mac n’ cheese mix (substitute vegetable pasta of your own choice)
Two large handfuls of shredded Colby Jack cheese (or cheese of your preference)
Splash of milk, bit of butter as per mac n’ cheese box directions
One pound of ground beef
A can (or two) of baked beans, BBQ is preferred but it depends on the taste
Optional: Spices - Smoked paprika, Herb de Province, Smoked Chipotle
Optional: Preferred BBQ sauce if using regular baked beans over BBQ baked beans
Items -
One pots, one pan/skillet for cooking the beef, strainer, mixing spoon
Optional: A large Wok
Directions: The easy way -
Heat up the wok/skillet ect. and splash in a bit of water just to not burn the pan. Add in the ground beef. Toss in your spices to taste, usually a dash of each will be fine. Break apart the clumps of beef and drain off the fat halfway through.
Prepare the Mac ‘n Cheese as per the mix box. Add in some Herb de Province instead of salt to the pasta water. Toss out one of the packets of powered cheese (or save for a different dinner) Combine the powdered cheese, milk and butter then pour into the pasta. Add in handfuls of cheese until sufficient gooey perfection.
Once both parts are ready, drain off the fat from the meat once more, use strainer if needed and run under water for a second. Put back into large Wok and add beans, let it simmer until hot. Add in favorite BBQ sauce to taste.
Put out tupperwear for the next few days (usually 5-6 depending on serving size). Add decent portions of both mixtures into the tupperwear and mix together. Serve yourself the remainder into a bowl and enjoy. Heat the next day in the microwave for 1.5 - 2 minutes.
Directions: The ‘hard’ way -
Prep is about the same, you just substitute vegetable pasta for the Mac n’ cheese. I usually save my extra packet of powered cheese just for this or you can make a cheese sauce yourself.
You don’t have to mix them in any specific order. I was planning on using the BBQ baked beans for something else today so planned on adding them in last. My photo is of the combined ground beef and mac ‘n cheese.
You can also substitute home made baked beans instead of canned though I personally haven’t tried that yet.
Notes -
This makes a huuuge amount of food at variable low cost. The Mac n’ cheese comes at to around $1 a box, same with the veggie pasta. Ground beef can be around $7-10 a pound depending on the grade/if its on sale. We usually buy in bulk and freeze a few portions. Baked beans are also pretty cheap if snagged on sale. I have fallen in love with the Safeway brand BBQ baked beans found in the Safeway Deli ($5 a tub and I use about half of it to make the mash). So all told you are looking at $20 for 5-7 dinners that are super easy prep after the first night. I like using my wok to prepare it because I can easily combine everything at the end though it can be combined in the tupperwear pots if you only have small cooking pans. It is actually better when reheated the next day as flavors have had time to mingle together. I usually make it on the weekend (or the day off) and it will take around 20 mins tops to cook all the parts. Then I have food pretty much for the rest of the week. The beans/meat give it protein, cheese is the dairy, and if you use veggie pasta you get a serving of vegetables in there so it’s a pretty all around good meal. You can make it without the BBQ to cut out some of the sugars or take out the beef if you are vegetarian. I have no tried it with other types of meat but encourage it ‘cause this dish is supposed to be experimental!
Mycenification: (Aka how Troll came up with this in the first place)
“I’m huuuuungry…” The dark Ineki whined as he looked through the cupboards. “There is nothing to eeeeaaaaaaat.”
“Sure there is, there is milky cheese shells leftovers, a little bit of ground bugs, and yesterdays bean soup in there. Pick one and eat it!”
“But I don’t waaaaannaaaaaa. We have had all three for daaaaaaaays.” He made a face, board with the same routine.
“Fine, here, let me see what I can do with it then.” The Troll squinted at each of the leftovers and shrugged. “Well, they taste good on their own, I wonder how they would taste together?” She got out a cauldron and started combining the bugs with the bean soup. “Mmmmm that already smells delicious. Now for the shells!” After adding those in she mixed it up a bit more before ladling it out onto plates. “Here, try this.”
“Wow, that is amazing!!” The Ineki was quite happy with the results. “And look, there is lots leftover for later!”
“Oh great, something else for you to whine about.” The Troll rolled her eyes playfully, happy that the dinner dilemma was solved.
Proof:
I actually made this today as it was my day off! This is just before I added in the baked beans. I kinda forgot to take an after picture:
This is the vegetable pasta version using a saved powder packet. I added in extra Smoked Chipotle Pepper to this batch ‘cause I have a bit of a cold.
Ingridients
1 small onion
2-3 cloves garlic
1 medium parsnip
1 medium turnip
1 medium sweet potato
1 half bulb of fennel
2 carrots
1 celery stalk
1 finger of fresh ginger root (about 1-1.5 inch chunk)
3 cups of stock, chicken or vegetable
1 28oz can/jar of crushed tomatoes
3 large bay leaves
Salt, Pepper, and Oregano to taste
Directions:
Set oven to 350 degrees. Get a large roasting pan or flat glass casserole dish and coat lightly with cooking spray.
Peel the parsnip, turnip, sweet potato and carrots. Chop them coarsely into bite sized pieces. Spread the chopped vegetables evenly over the bottom of the pan, sprinkling with a little salt before putting into the over to roast for about 45 min or until vegetables are tender, turning over once about halfway through the cooking time.
While the vegetables are cooking, get a large soup pot. Peel and dice the garlic and onion before sauteing in the pot on medium heat, cooking them until they begin to brown and caramelize.
Slowly add about one cup of the stock, using the liquid to help scrape up any browning left in the pot before adding the rest. Stir in the crushed tomatoes and bring to a gentle boil
Chop the celery and the fennel. Here is a helpful video if you are intimidated by the fennel. It’s actually very easy. Just make sure the pieces are bite sized. Peel the ginger and slice into thin disks. Add the celery, fennel, ginger and bay leaves to the pot.
Lower the temperature, cover the pot and allow it to simmer until the vegetables are done roasting.
Remove the roasted vegetables from the oven and move them to the pot. Add salt, pepper and oregano to taste. You can also add in other seasonings if you like, such as basil, paprika or even a little chipotle powder to give it a little spice, but I find the simpler the better. Allow the soup to simmer for about another 5 minutes. Remove the ginger disks and bay leaves before serving.
This dish is low fat, very filling and can be served as a starter or with some crusty bread as a meal of it’s own. Makes 4-5 servings so invite some friends to share with if you don’t like leftovers.
Winters in the cave could be cold and harsh in more ways then one. As temperatures and food stores drop so can the threshold of tempers. Olossë and Misaki could only look at each other sadly as they watched hearts harden around them like the freezing ground. Door being barred from the friends that used to trust and eagerly help during warmer, better times. Something had to be done. But what?
Then Olossë had an idea.
One day he emerged from their warm little home making his way out some distance from his house where the others would see him. He carried a load of driftwood with him and once he’d found a spot he was sure would be noticed by everyone he settled in to build a fire. And noticed he was. The warm flickering light started drawing faces to the windows, wondering what on earth he was up to. “That one has no sense” some thought watching, wondering why he was bothering to build a fire out in the open like that. “A waste of good fire wood,”thought others. “If he has too much to heat his home I’d certainly have taken some off his hands.”
It became even more puzzling when Misaki came out to join him with more wood. Really? More wood? The both of them have lost it! Their brains must have frostbite. But oh it was a lovely fire. Big and warm. There had often been camp fires during festivals. And now the young couple were abandoning their fire? Some of the onlookers pondered if there was a chance to race out there and find a flaming piece of wood to carry some warmth back inside. But they were coming back. Or… trying to. Hauling something large and heavy.
From his home Asher frowned to himself as he watched them struggling with a cauldron that was bigger then either of them. Especially Misa. He remembered how in the spring she had helped him after he’d hurt his leg trying to gather flowers and nearly got caught by the bone monster. That pot was too heavy for her. She was going to hurt herself. The guilt hit him hard and before he knew he was even doing it he was out there helping to carry it. Two others also came out to help, and the cauldron was soon at the fire.
Not missing a beat Misa scampered off to get buckets and fetch water, and Olo went for more wood. “That was too much” others thought, remembering kindness that had been shown to them at times. Because if there friends kept using all theirs they wouldn’t have enough to last till spring. And no one wanted their friends to freeze. More started to emerge with buckets for water and maybe a stick of firewood or two, wanting to help just a little.
After the pot was filled and the fire stoked to boiling another shocking thing came from the young pairs home. FOOD. Tasty roots that Misa found along with jars of red tomatoes she’d snuck back into the cave with in the spring and preserved to last till next. But it was clearly not enough to make anything. Not in such a big pot. She tucked the roots in clay pots around the glowing coals and as the sweet smell of cooking started to spread so did the others. “I have a little something extra. Some turnips. Some carrots” they thought as pantries and larders were opened and dug through, as more ineki emerged from their doors with things to contribute. Herbs were thrown into the pot with things to flavor the broth while more vegetables were tucked into the coals to roast.
Soon there was no one left holed up. Everyone had come outside to help cook and gather around the fire. Arguments and harsh words that had been festering as grudges were forgotten as friends huddled together as if nothing had happened. “Where is your scarf? What do you mean you don’t have one? Here take mine! No really, I have another inside,” or “That cough sounds terrible. I have some tea that would fix that right up. Come over to my place later and I’ll get you some,” could be heard mixed with laughter as the soup came together. And after everyone had a taste and agreed it was ready, bowls were brought out and passed around so that no one was left out.
As the cave filled with the contented sound of slurps and sighs and pleasant conversation Misa slipped over to Olo, nuzzling in with a soft purr against his shoulder as her tail entwined around his. He was brilliant to think of this. And the cave had never felt so warm.
ingredients - OwO
pancake mix
water
eggs
oil
mushrooooooms(optional)
Directions - OWO
Mix pancake mix and water -pour on heated pan with oil-pancakes done
remove pancakes from pan - break eggs - cook as desired
remove eggs from pan (or add mushrooms to eggs i cook my mushrooms separate :D)
Mycenification - OOWOO mycena pancave
i built a pancave with egg and mushroom fields i was gunna do a bone monster ....but…he didn’t cooperate >> so he’ probably trolling ineki inside the caves
A very simple, very cheap recipe courtesy of my limited fridge.
Ingredients:
-One Roll of Crescent Rolls
-Pepperoni (Can be replaced with Mushrooms for Vegetarian)
-Shredded Cheese
Cooking Instruction:
-Heat over to 375 degrees Fahrenheit.
-Roll out Crescent roll dough, sprinkle in cheese, pepperoni and/or mushrooms!
-Roll small side inward, fold over self.
-Form into a dumpling shape with the top dough, by pinching in corners to close ingredients inside.
-Shape top pieces of dough outward into ears or horns!
-Add cute faces made from cheese, pepperoni, or mushrooms!
-Bake for 10-12 minutes.
Mycenafication:
Their cute critter faces are delicious.
Made into a Drasillis, Bone Monster, and Ineki! Sorry if it’s hard to tell which is which, they have literal butter-faces.
-Tube of crescent rolls (I use Pillsbury but any kind of dough that comes in sheets will do)
-Marshmallows (standard sized ones)
-1/2 cup of sugar or so
-Three tablespoons of cinnamon
-A small dish of melted butter (three tablespoons will do)
- Recipe: Instructions
1. Break out a cupcake pan and put in cupcake liners
2. Mix Cinnamon and sugar together in one bowl and melt the butter in another small bowl
3. Take one marshmallow and wrap it in a segment of dough (make sure it is pinched closed all the way)
4. Then roll dough wrapped marshmallow in melted butter
5. Then roll in Cinnamon Sugar
6. Place in the cupcake holder
7. Bake 400º oven 7 minutes or until nice and brown
8. Cool (But I always like to try them while they’re warm!)
If done correctly you should have hollow buns just like a cavern!
(Short story involving two of my pets: Wilson and a sort of appearance by Anansi.)
Wilson sat perched upon a stool. His hands were steepled with his forehead resting against his tightly interwoven digits. Time seemed to warp itself. Had it been seconds? Hours? Minutes? Or had no time at all passed… He was too afraid to look at the chicken shaped time that rested on the wooden farm table at which he sat.
“Cock-a-doodle-dooooo!” crowed the timer. It vibrated with such vigor he could feel the tremors running up from his elbows to his head.
He swallowed hard.
It was time.
He slapped the chicken’s head and the alarm ceased. He stood swiftly, closing the distance between him and the oven in a few strides. He donned his hen oven mitts and with a deep breath, opened the oven door.
The sweet scent washed over him. It was so sweet… So… cinnamon-y. His mouth was watering but deep down he was afraid.
Wilson set down the cupcake pan and looked upon the golden brown balls of sugar and fat he had concocted. It had taken him no longer than seven minutes to bake but he had the distinct feeling that time was running out. He tossed aside his oven mitt and reached for one of the hot rolls.
KNOCK! KNOCK! KNOCK!
Wilson’s blood turned to ice in his veins and he retracted his paw. His wide eyes lifted to the door to the kitchen that he had locked before he started to bake. Had he imagined it? There was no way anyone was at his door.
BOOM! BOOM! BOOM!
No! How could this be?! He had taken extra precautions this time. He had been telling his neighbors for weeks that he was on a diet. He even made a show of eating a brussel sprout raw in front of the grocer. Heck! He had done to a completely different cave to get the actual ingredients he needed to make his special fat dollops! What more could an Inkei do?
“Wilson! Can I try one of you Cavern Buns?” Came a sickeningly friendly voice on the other side of the door. It was a voice that belonged to one of his neighbors. One of his friends. But now it was warped with lust for butter and sugar soaked delights.
Wilson threw himself across the room and slammed into the door. The banging started anew and he could feel it rattle his frame as he acted as the prop to keep the door closed. Did they have the bone monster with them? It felt that way… The door wouldn’t be able to stand the assault much longer and neither would he.
Tears began to well up behind his glasses. Curses! What could he do? He squeezed his eyes shut and tried to think of what a person much wiser than himself would suggest. All that came to mind was the dirty spider he had met in the tunnels not too long ago.
Anansi said in his mind: “Give it up. You’re screwed.”
Wilson whimpered and nodded. Imaginary Anansi was right. He only had one recourse.
“Oh, alright.” He wailed. He unlocked the door. No sooner did the tumbler click was he thrown back. He sat on the floor in a daze as a stampede of his once cordial neighbors flooded his kitchen. He was deaf to their false pleasantries and compliments about what he had done with his curtains or how nice his new counter tops looked. All he could hear was them munching.
They were gone in less than five minutes. Like a swarm of locusts off to devour the fruits of someone else’s labors. He picked himself off the ground and dragged himself back to the kitchen counter. Where there had once been perfect spheres off goodness was now nothing but an empty pan.
His brow twitched in barely constrained anger.
“This is the tenth blasted time I’ve made these! And I still haven’t got to try a single one!” But anger quickly faded to bitterness. He sank to his knees and rhythmically beat his head against his white washed cabinets.
He sucked in a deep breath and collected himself. “Oh well. I heard Miss Martin is making her blueberry pie later this afternoon. I’ll just drop in for a slice, and to say hello.”
Recipe: Ingredients
Recipe: Instructions
Creative: Mycenification
Proof of Preparation
Ingredients
Part 1
1
1/2 cup
butter
(whole stick)
5
1 tsp
vanilla
2
1/2 cup
sugar
6
2 cups
graham crackers
crumbled, blended, or pulverized
3
1 each
egg
7
1 cup
coconut
sweetened or unsweetened & shredded
4
pinch
salt
8
1/2 cup
walnuts
pieces(can sub any nut you like or omit if necessary)
Part 2
1
1/4 cup
butter
softened (half stick)
3
2 cups
powdered sugar
2
2 Tbsp
instant pudding mix
vanilla or use another flavor for a new variety
4
2 Tbsp
milk
Part 3
1.1
1 cup
coconut
toasted or untoasted
1.2
1 cup
chocolate chips
melted
Equipment Needed
Small to Medium pot
Large mixing bowl (Either 1 or 2 depending on if you want to wash it in the middle)
Small microwave safe bowl
Spatula
Measuring Cups
Measuring Spoons
Baking pan Small to Medium sized
OPTIONAL
Whisk or Electric mixer
Blender or Food processor
Any regular can from the cupboard & plastic sandwich bag
Your hand & plastic sandwich bag
Frying Pan
Instructions
Measure out and prepare ALL ingredients for Part 1. The graham crackers need to be crumbs so you have many options to get them that way. Put them in a blender or food processor. Put them in a sandwich bag and crush using a can as a rolling pin or banging with your hand. Put in a bowl and crush with your hands. All will work just fine to get crumbs. Do the same with the nuts if you have whole nuts.
Make a double boiler by placing a bowl over a pot of water that has reached a boil and been reduced to a simmer. There should only be an inch to an inch and a half of water in the pot. When you place your large bowl over this smaller pot the bottom of your bowl should not touch the water or you will burn your ingredients. (Just in case it is needed) Boiling is when the water at the top is bubbling and a simmer is when it is just below a boil and very few bubbles are reaching the top.
SAFETY NOTE
The steam escaping the pot around the bowl is very hot and will heat up the bowl. Use oven mitts when handling the bowl to remove from pot!!!
Place first 5 ingredients from Part 1 in your mixing bowl. Cook over the hot water stirring frequently until it is smooth and the sugar has dissolved. (It won’t feel gritty against the side of the bowl.)
CAREFULLY remove your mixing bowl from the double boiler and turn off the burner. Add ingredients 6 through 8 of Part 1 to the bowl. Stir until combined and evenly distributed.
Dump your bowl into a baking pan and use a spatula or your hands to press the mixture flat and covering the entire bottom evenly. Part 1 is now done!!!
Combine ALL ingredients from Part 2 in a clean mixing bowl. Use a spatula, whisk, or mixer on low speed to make an icing. Once it is smooth and all looks the same it is ready.
Dump this bowl out on top of the first layer in your pan. Use your spatula to spread the icing over the crust evenly so it is all covered. Part 2 is now done!!!
Part 3 has alternate ingredients. You can choose how you would like to make yours.
Sprinkle the coconut either toasted (which requires another step) or straight out of the bag on top of Part 2 and its ready.
Place the coconut evenly spread over the bottom of a frying pan over medium low heat. Keep a close eye on it so it doesn’t burn. Stir once in a while to brown more of the coconut but spread it flat again after stirring. Once it is toasted to your liking remove from heat, turn off burner, and allow to cool. Once cool sprinkle over the top of Part 2 and its ready.
Put the chocolate chips in a microwave safe bowl. Put in microwave 10 seconds at a time stirring in between each interval until it is smooth
Pour the chocolate out in small piles across the top of Part 2 for easier spreading. Spread the chocolate across the top until it is completely covered. You may need to melt more chocolate.
Eat right away with melty chocolate or place in fridge until the chocolate sets back up to solid again. Part 3 is done!!!
Another option is to do the chocolate layer and then sprinkle the toasted or untoasted coconut on top of the chocolate!!
Cut into bars and enjoy!
Mystica and the Sprouts
Mystica was playing with the sprouts like she does most days when one of the children stopped to ask her a question.
Yarnina asked, “Can’t we have a treat Todayyyyy? Please, Please, Pretty Please!!!”
Mystica was going to tell the young Ineki that they didn’t have any treats when a thought occurred to her. She had all the ingredients to make Flanigan’s Fancy, a recipe she received from her mother that had been passed down through the family.
“I think we can make some treats happen.” Mystica replied, “We just have to make them first!”
The young sprout got a wild mix of exasperation and confusion on her face and sat pondering for a bit before asking a new question.
“How…um…I mean…What do you do?” she asked timidly.
Mystica knew of course that this would shock the children. They hadn’t needed to make anything to eat for themselves and assumed everything just was.
“Don’t worry Yarnina I will help you the whole way through and your treats will taste even better,” Mystica said, “because you made them yourself. Run off to play with the others now and don’t tell anyone. You’ll ruin the surprise.”
So Yarnina still very confused went off to join the others hunting for tiny frogs by the pristine lake. Mystica went inside her cottage to prepare everything. She pulled out ingredients and dishes. She whispered through the wind with her air magic to her neighbor Cecelia asking if she could magic up 6 mini aprons for the sprouts and bring them over. Once Mystica had everything prepped and was about to call in the children she had been keeping an eye on through her open kitchen window she heard a knock at the door. It was Cecelia of course.
“What do you have planned for the kids today Mystica?” she asked once the greetings had passed.
“Well the kids wanted some treats,” Mystica said, “So I thought I’d show them how to make some.”
“You are always so clever with the children dear.” Cecelia responded. “I’ve got the aprons you asked for, and I even customized them with their names.”
“Seems I’m not the only one being clever. You could stay and help if you’d like Cecelia!”
“I’d love to dear but I’ve got errands to run. Have fun with the kids.”
Cecelia left and Mystica went to round up the children and pass out the aprons. Once she got them all inside she gave each of the children a task to do while she busied herself with the hot parts. In less than an hour the kids all had their coconut treats. Mystica had even remembered to send an air message to another neighbor to ask if he could set up 7 (or 8 if he wanted to join them) Tropical Coconut Dreams on the community picnic tables under the maple trees. Her kitchen was a mess with dirty dishes, powdered sugar dust with mini paw prints in it, and even a dropped egg on the floor which she had poured salt on but the kids were enjoying themselves.
She got them all cleaned up and ushered them out to the picnic tables where she passed out the treats they had made together.
Saquire sat admiring and said, “Mystica I think you have outdone yourself today. Here’s a tasty drink for you and I’ll take one of those bars if you don’t mind.”
“Thank you and I don’t mind at all. That is exactly why I invited you to stay once you delivered the drinks Saquire.”
So they all enjoyed their snacks and drinks before slowly creeping off to play with the frogs once more. Yarnina was the last to leave the table. Before she left she tugged on Mystica’s tail to get her attention.
“Thank you for the treats Mystica.” Yarnina whispered in her ear, “You were right they did taste better this way.”
Then she giggled and ran off too.
Family Recipe
I don’t have any pics of when I’ve made it at home but these are a fancier plated version I made at work. If anyone is interested that is a homemade banana pudding with a caramelized banana on top and a coconut cream sauce on the plate. I believe I have the recipes for both still but the bars by themselves are the homey way of having them.
- Recipe: Ingredients
- Recipe: Instructions
- Creative: Mycenification
- Proof of Preparation
(help, I don’t know how to make the little tick boxes ;;)
BRILLIANT BROWNIES BAKING RECIPE
Ingredients:
250g butter
250g caster sugar
4 large eggs/6 medium eggs
200g ground almonds
300g dark (preferably cooking!) chocolate (at least 70%!)
greaseproof paper (not really an ingredient, but make sure you have it!)
Instructions:
Pre-heat oven 150C.
Mix all the butter and sugar together in a bowl (this works best if you have a food processor, but if not, melt the butter gently over the stove and mix it with the sugar.)
Crack all the eggs and separate the whites from the yolks. The whites should go in a clean bowl. The yolks I usually leave in the egg shell.
Then add the yolks one by one to the butter/sugar hybrid mix and mix them in.
Break up 2/3rds of your chocolate and melt gently over a boiling pan of water.
While the chocolate is melting, beat the egg whites until they form soft fluffy white peaks. Like clouds. (...If you don’t have an electric whisk, this is 15 minutes hard labour with a fork or a hand whisk. ;; You can make it slightly easier by putting the fork/whisk in the fridge for a bit first!)
When the chocolate is all melted and ready, add it and the almonds to the butter/sugar/yolk mixture.
Add 1/4 egg whites to this mix, fold in gently.
Add the rest of the egg whites gradually and fold them in too.
Put greaseproof paper into a shallow baking tin/tray…I use a roasting tray, but anything is fine. 8D
Dump the mixture on top of it and smooth it out until it’s even and fills the tray!
Take the remaining third of your chocolate and break into small bits. Scatter over the top of the mixture for delicious delicious chocolate chunks.
Stick in oven. Wait as patiently as possible. (approx 20-40mins, depending on your oven!) Bonus: your kitchen will smell delicious while this is happening.
Test your brownie by poking with fork/knife/skewer; it should come out clean when ready!
Let it cool for 5-10 minutes and then cut into chunks & enjoy! (or eat the whole slab. >o> no-one’s judging!)
Mycenification: Jellybean was super excited to hear there might be chocolate…! (It’s not for you, Jellybean. >:I)
Proof:
I’ve made this recipe a couple of times, & I can prove with additional photos that the utensils/piece of kitchen that you can see in this photo belong to me if necessary! :)
(Or I could make the brownies again…what a sacrifice that would be. :P)
I also have some photos from when I made them at my sister’s flat recently: pre-baking!
She only had a very shallow baking tray so I had to spread the mixture over two of them, which meant thinner brownies/less chunks. :( post baking, in the cooling stage. nom nom nom
(behold the crappy phone filters!)
So, I made these at work… and I forgot to put my username in there because I derped (and it was 5:30 am and I was SUPER SLEEPY), but this event/challenge was what gave me the inspiration to make them for the restaurant! I’ve scaled down the recipe by.. a lot. xD No one on the MC staff needs 6, 20oz loaves of scone dough. However, if you’re a kitcheneer and you love making sure the neighborhood ineki get a good meal while they’re out blazing those trails, having on or two extra batches lying around might not be such a bad idea~
Ingredients!
1 lb. Unsalted Butter
1/2 Cup Brown Sugar
1/2 Cup Granulated Sugar
9 Cups All-purpose Flour
1/4 Cup Baking Powder
1 Tbsp. Salt
2 Tsp. Ground Cinnamon
1 Tsp. Ground Ginger
4 1/2 Cups Heavy Cream
1 Cup Granola*
1 Cup Dried Fruit Medley**
Instructions!
Toss butter and sugars together into a mixing bowl.
Mix with the paddle attachment/an egg beater/your hands until it’s uniform and smooth (sugars will still be grainy!)
Mix all dry ingredients together. Add to butter/sugar and mix until you get pea-sized beads.
(This helps keep little pockets of butter ‘alive’ in the scones as they bake, helping them get big and fluffy!)
There will be unmixed flour, and that’s just fine~
Now where things get “tricky,” or where most things go wrong.
Add the cream, BUT ONLY UNTIL YOUR DOUGH IS JUST BARELY COMING TOGETHER. Then add your ‘fun stuff/goodies/yummer-doodles.’ (The granola and fruit)
Pat or mix or knead very gently until everything just comes together.
Cut each loaf into quarters; align on a baking sheet pan at least an inch apart and sprinkle
the tops with ground up mushrooms raw sugar for sweetness and texture.
You can also do/substitute slivered almonds, sunflower seeds, or whatever else you might prefer as a topping.
Bake between 325-350 degrees F for appx. 20-25 minutes.
(I find the length and heat required vary from oven to oven. orz)
Enjoy~!
I hope this was entertaining for you! Now, here, I have some other notes I… notarized earlier, but ‘hidden’ for the sake of keeping this short. orz. (smaller portion in spoiler)
*The Granola I used was a mix of instant oats, sunflower seeds, and slivered almonds, held together with a blend of honey and canola oil. We make it from scratch in the kitchen weekly.
** The fruit mix is equal parts apricots, tart cherries, currants, and golden raisins.
At any point, you can substitute any portion of the granola or the fruit mix for chocolate chips. I actually encourage it. so, something like, 2/3 cups each of chocolate nibblets, granola, and fruit would be ideal. Obviously you can choose to add more or less of any of the fillings. It will just result in a more ‘loaded’ scone.
Also, there’s a smaller batch in case you don’t want enough to feed an entire adventure crew!
2oz.(4tbsp.) Unsalted Butter
1 Tbsp. Brown Sugar
1 Tbsp. Granulated Sugar
1 1/2 Cups All-purpose Flour
1 Tbsp. Baking Powder
1/4 Tsp. Salt
1/3 Tsp. Ground Cinnamon
1/4 Tsp. Ground Ginger
3/4 Cups Heavy Cream
2 Tbsp - 1/4 Cup Granola
2 Tbsp - 1/4 Cup Dried Fruit Medley
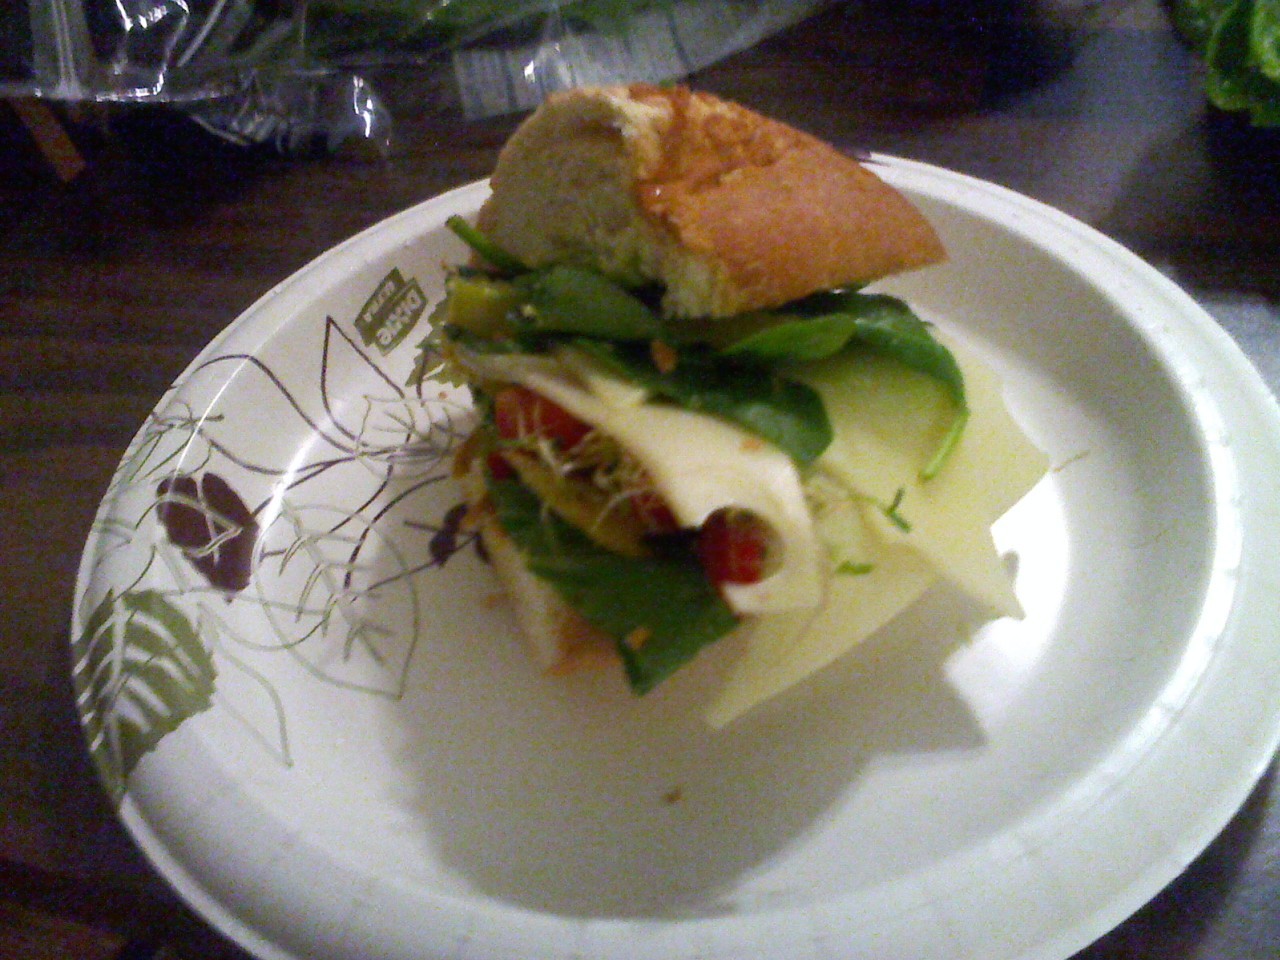
- One Whole Loaf of Bread (Buy the good stuff! You can buy a “Freshly Baked Today” loaf from Walmart for about 1.50c give or take, but I buy the Loaves from Raley’s or Safeway because they are superior and they cost about 2$ each give or take. I go with Dutch Bread.)
- Choice of Cheese (If you cannot eat cheese, feel free to leave this out or substitute it for anything. It’s just the “meat” of the sandwich for me, since I’m vegetarian)
- Romaine Lettuce
- Alfalfa Sprouts
- Spinach
- Bell Peppers
- Avocado
- Pepperchinis/Picked Banana Peppers
- Mustard
- Seasoned/Seasoning Salt
- Pesto (I use Pesto & Basil sauce)
OPTIONAL:
- Lunch Meat (I’m vegetarian so none of this for me)
- Mushrooms (I’m basically allergic to Mushrooms so its not in the pictures)
- Mayonaisse (I try to stay away from Mayo so none for me)
- Pepper, Salt, Other Spices
Instructions:
1. Take your loaf of bread and cut it in half BUT not all the way through to the other side. You will want to leave some bread connected so it stays intact and doesn’t fall apart.
2. Take your mustard and slather it on one side. Take the seasoning salt and shake some onto the mustard. (If you want more spices, feel free to put the spices on it now. If you also want mayonaise on your sandwich, put it on top of the mustard as necessary)
3. Take your pesto and slather it on the other side of the bread.
4. Take your Romaine Lettuce and layer it inside the sandwich.
5. Cut your bell peppers into thin slices and place on top of the new layer. (If you want mushrooms in your sandwich, this may be the place to put them.)
6. Cut your avocado and put the slices across the top of the new layer.
7. Place as many alfalfa sprouts as you’d like on the new layer of avocado.
8. Place your choice of cheese on top of your new layer. (If you want to put your lunch meats on, this would be the time).
9. Put your Banana Peppers on top of the new layer.
10. Place your spinach on top of the new layer.
11. Turn your Sandwich to the side and make sure all the contents have been tucked neatly inside. Begin to cut the sandwich into whatever size you want.
12. Distribute sandwiches to everyone and enjoy!
Mycenafication:
Izem stared at the random assortment of vegetables on their table, frowning while rubbing their chin with a paw. What could they possibly create with this pile of greens? Surely nothing palatable…
At that moment, Cvetka walked in with a loaf of bread in a basket, amongst other things, smiling at the ineki who was flopped on their belly.
“What’s wrong Izem?” Cvetka asked with bemused worry, standing next to the bigger ineki.
“This food! I’m hungry but there isn’t anything I could make with this junk…” Izem sighed dramatically and flopped onto their back. Cvetka’s giggling only made their pout bigger.
“You’re so precious. Here, let me see if I can turn this into something for you…” Cvetka places her basket on top of the kitchen table and begins her work, Izem eagerly bouncing around the table in anticipation. Cvetka always managed to turn even the strangest ingredients into a meal.
After some quick work from the ineki as she quickly broke apart lettuce and cut apart vegetables, slathered on sauces and spices, and assembled the sandwich, she cut the sandwich into decent sized pieces and took a step back to look at her handiwork.
“There, that wasn’t so difficult now was it, my love?” Cvetka looks over at Izem in time to see the other ineki shove a sandwich into their mouth and devour it in one bite. Cvetka looks alarmed, but manages to make it look as dainty as possible. “Well then…”
“Shorry,” Izem says with their mouth full, but it doesn’t sound genuine especially as they reach over for another piece. Cvetka smiles and shrugs, motioning for the ineki to continue.
“It’s okay, I made this to be eaten. Just why not leave a piece for Sabre?”
This recipe is indestructible. Seriously. You can substitute pretty much any part of it, tweak to suit your personal preferences, or leave things out entirely, and as long as you have enough liquid, you literally cannot ruin it. Slow cookers/Crock Pots are wonderful things. You can buy a small one almost anywhere on the cheap, but large ones make massive amounts of leftovers, which helps get more value out of your recipes! Stretch this out even more by serving it over rice.
Ingredients:
top round roast (substitute any protein of choice, or leave out altogether!)
one packet onion soup mix
one cup red wine
veggies to taste (I use potatoes, carrots, and broccoli)
salt
pepper and/or peppercorns
garlic powder
Instructions:
In slow cooker/Crock Pot, combine packet onion soup mix and one cup water.
Add protein of choice. Beef or pork work equally well for this recipe, but you can substitute any protein. (Lean cuts of meat do not work well for this. You need fair bit of fat to keep the meat moist.)
Place sliced potatoes (no thicker than 2”/5 cm in diameter) and sliced or baby carrots around the meat.
Pour one cup red wine over top of meat. (Have some for yourself. No-one’s looking.)
Season with salt, pepper (red, black, or full peppercorns are all delicious choices), garlic powder, and anything else that floats your boat.
Cover and cook on low for at least 8 hours.
If you’re including broccoli or cauliflower, or similarly delicate veggies, add them about an hour prior to serving, and turn the slow cooker to high.
Naleśniki darted around the kitchen, a growing mountain of ingredients piling up in his paws. On his hind legs he danced back to the pot, juggling items that already threatened to fall. Once he was safely in front of the counter, Naleśniki dumped his tipping burden atop the shining marble, and reached for a small knife. He made short work of potatoes, carrots, and mushrooms, roughly chopping them and tossing them in. Pearl onions and green peas followed, rolling merrily down the sides of the thick side of boar meat nestled snugly in the bubbling stock.
Seasonings followed: sea salt, black peppercorns, crushed cloves of roasted garlic. A splash of red wine spilled over meat and vegetables, staining the stew a mouthwatering shade of red. Naleśniki hovered over the pot, smelling deeply of the steam that rose from it.
“You beautiful thing, you,” he crooned to the meat. “They’re going to love you. And if they don’t… more for me!”
(before I destroyed it)
(in the midst of the destruction, where you can better see the deliciousness)
I make these in a cake pan but it totally works as muffins too!
Recipe: Ingredients
- 3 Bananas (The more ripe, the better!]
- 1 egg
- 1 1/2 cups all purpose flour
- 3/4 cup granulated sugar
(Or brown sugar, if that takes your fancy. You can also mix it up and do 1/2 sugar and 1/3 honey, though this makes for stickier goodies!)
- 1/3 cup melted butter
- a teaspoon of baking powder
- a dash of salt
- Nutella of some sort (highly recommended. But can substitute choc. frosting or peanut butter or just plain!)
Optional: Nuts! Raisins! Chocolate chips? Whatever else you like with your nanas, dear!
Recipe: Instructions
Preheat your oven to 375 F, lovely! (or, if you’re like me and use a toaster oven for such things, turn and look at it and make sure it’s still where you left it. Maybe scowl at it a little bit - I won’t judge. I don’t know how your relationship with your toaster oven is)
Mix those dry ingredients together. Your baking powder, your sugar, your salt, and your flour should all play nicely together in your mixing bowl. If they don’t, consider putting the unruly ingredient in a short time-out. (If you’re adding extras, like nuts or the like, throw these into the dry ingredient playdate too)
Melt your butter. A few short seconds in the microwave will do.
Introduce the inside of your egg to the inside of a bowl and stir it with a fork until it is all one uniform color of goo.
It’s time to do the fun part! Peel those nanas and break them up a little (into a bowl!) to make things easier. I usually add my melted butter to the banana pieces but this is not vital. If you have a mixer thing, have at it, my friend. Turn your bananas into pudding with the power of electric turny bits. If you don’t, grab a fork and proceed with the most fun nana squishing of your life. Try to turn it into a relative paste because it will make the next part easier.
Introduce your dry ingredients, your banana paste, and your egg to the inside of the same bowl. Mix them all together until it looks like very weird baby food but smells kind of awesome.
Put the whole lovely, gooey mess into your baking dish of choice and put it in your oven/toaster oven for about 20-25 minutes, depending on the sheer power of your baking space and/or elevation.
Once it’s cooled, slather it with a bit of nutella (or other). Trust me.
Eat it!!!
Creative: Mycenification
Proof of Preparation
Uh, my cake cutting skills are subpar and I did not wait until the recommended ‘cool’ stage to put on the nutella. However, I assure you that it tastes far better than my messy cutting skills imply.
1. check magical self-restocking freezer for chicken macaroni
2. retrieve pre-packaged chicken macaroni from magical self-restocking freezer
(if self-restocking freezer has malfunctioned, go to method 2)
3. remove lid from pre-packaged chicken macaroni
4. place pre-packaged chicken macaroni into magical food zapping apparatus for 6 minutes
5. retrieve pre-packaged chicken macaroni from magical food zapping apparatus and enjoy
(optional: add salt and pepper and extra shredded cheese for better taste)
p.s. img tags don’t work within list tags is this intentional
Method 2 (in case of malfunctioning self-restocking freezer)
beg parents with costco membership for pre-packaged chicken macaroni
wait for parents with costco membership to buy pre-packaged chicken macaroni
go to method 1
Method 3
cook macaroni in a pot o’ boiling water for 30 minutes
drain water, throw everything else in and stir
throw it all away because i’m a poor college student still living with her parents that doesn’t know how to cook and probably burnt it all
1 1/2 cups of butter
1 8-oz package of cream cheese
3 cups of sugar
1 tbsp vanilla extract
6 eggs
1/4 tsp salt
2 cups of all-purpose flour
*1/2 cup of almond flour
*1/2 cup of coconut flour
*Since this is a budget edition, you can substitute the almond and coconut flour with one more cup of all-purpose flour (making a total of 3 cups all-purpose flour). If you do this, add a 1 tsp of almond extract for substitute flavor.
1. Pre-heat oven to 325 degrees
2. Blend the butter and cream cheese in a large bowl. Add sugar gradually. Cream together until it is fluffy and sugar is mixed thoroughly.
3. Add vanilla extract and beat mixture.
4. Add eggs two at a time and beat mixture.
5. Add the all-purpose, almond flour, coconut flour, and salt. Beat until the batter ingredients are evenly distributed.
6. Pour batter in a well-greased 10-inch Bundt or tube pan. Dust flower to the sides of the greased pan.
7. Bake for 1 hour and 15 minutes. Insert a toothpick to check if it comes out clean. Cook longer if it is still sticking to toothpick.
8. Cool in pan for 5 minutes. Invert onto a plate to cool completely before putting it into a container.
Midori gingerly pulled out a cake from a warm oven. A sweet, rich scent wafted in the air as her eyes lit up in delight.
“This dessert looks splendid! I can’t wait to try it out.”
A green ghost named Humphrey peered over her shoulder, staring wondrously at the baked good. “But you already know how it will taste. You make this every spring. It’s a family recipe.”
“Ah, but this one is different. I added… a special function to this one.”
A blue ghost named Oliver wrapped around her waist, as if summoned by the aroma. Or… was it?
“Why can I smell this? If I could, I would be salivating… But you know, since I’m DEAD, that’s not usually an option. Are you playing with that ghost bakery line again? It’s cruel to temp us…”
Midori gave a wide, toothy, satisfied grin.
“I told you this one was different, try it out for yourself.”
The ghosts were skeptical, but they gathered around the cake that she put on the oak table. Oliver grabbed the knife next to it, neatly cutting a slice. A strange violet smoke poured out of it, glitter hanging in the atmosphere. Humphrey nervously took a piece for himself, sliced unceremoniously.
“...Cheers, I guess,” Oliver said, putting it into his crooked mouth. His face was in utter shock in less than a second. He could taste it!
Humphrey was flailing around wildly besides him. “You did it! I can enjoy eating in the afterlife! What a time to be alive!”
Midori gave a released sigh and chuckled. “I finally did it… Though I’m not sure you can say that, Humphrey.”
The green ghost gave a bashful glance, pulled another piece from the cake and disappeared into the other room with a quiet ‘thank you.’
this kind of made me homesick omg is school over yet
Recipe: Ingredients
This will feed you for mucho long time because idk how to make single serving only enough for Italian family hehehe
2x box of pound of spaghetti (brand of choice: Ronzoni) (fun fact: even though dish called broccoli and MACARONI I do not use macaroni shaped pasta. whoopsie.)
3x box of froxen broccoli florets (or chopped or cubes or heads but florets is the best)
((okay I’ve been thinking and this really does make a lot so 1.5 boxes and 2 bags of broccoli may be better hmm))
Pepper, Garlic powder, pinch o’ salt
Optional: chicken bouillon cube (for extra flavor!)
Also optional: grated cheese (parmesan or pecorino romano)
Other things you will need:
Big pot! (I mean it! a big one! your sauce pot! nice n’ deep. ALMOST big enough to fit child in.. almost.)
Place that makes water get hot (e.g. oven top or illegal dorm room hot plate)
Recipe: Instructions
1. step A: wonderful big pot of delicious water. tap water is Bueno. at this point is nice to put in spices! garlic powder and pepper, don’t be shy! for the salt, just a bit, not a lot. this is good time to put in chicken bouillon cube, if you so desire. stick that crazy jug on high and wait for it get all boily
2. step b: yay iit’s boiling! open up those bags of delicious frozen broccoli NOMS and dump that stuff right in (pro-tip: cut hole in side of package, then dump them so that the hole is submerged and the bag empties without splashing spicey boiling hot water all over you. ouchie!!) wait for boiling to happen again
3. is boiling again??? yay!!!! throw in your pasta, m8! LETS BOIL IT AGAIN
4. actually you just wait for the pasta to get to your preferred hardness/cookedness level. (okay. I know that happens when it boils again. but hey im not here to judge how you like your pasta!!)
5. dump into bowl. add ice cubes if pansy like me and hate waiting for the noms to cool down back to edible temperature
6. add cheese gratuitously
7. EAT YOUR 7 DOLLAR MEAL FOR A WEEK YAAAAAASSS
Creative: Mycenification
“What’re those? They look like trees!”
“How do YOU know what trees look like?”
“OLIVER told me so!”
“Oliver doesn’t know anything!”
“Hey, yes I do!”
Mei held up a hand to silence the three young ineki before her.
“They’re not trees, but they do kind of look like them. They’re called…” she paused for emphasis and relished in the way the three sets of big, bright eyes before her lit up with anticipation. “... broccoli!” she threw her arms out grandly. Rosie scrunched up her nose and Oliver made a surprisingly convincing gagging noise. Piper tapped her chin thoughtfully for a minute.
“I thought that stuff was icky?”
Tang Mei just laughed and spooned the hot pasta dish into three bowls. She tossed in a couple of ice cubes so it wouldn’t burn their tiny tongues and then handed a bowl to each.
“It’s not, especially when you add cheese.” She said, holding out a container of grated cheese. Piper was the first to take it and dumped a couple of spoonfuls into her bowl. She mixed it up, splattering it all over her pink fur, and then daringly took a bite. A few thoughtful chews later and she was digging into the pasta ravenously. Mei laughed again as the other two watched in astonishment before trying their own bowl. She turned around to get herself a bowl and by the time hers was ready she looked back a three very empty bowls and very expectant, very MESSY faces.
Proof of Preparation
this what it look like after you heated it up hehe still so yummy tho mmm maybe even YUMMIER?? (sry a lil blurry got excited)
me and broccoli and macaroni are in love. I probably could have just put my account number somewhere huh hahaha
ok so this is a recipe for vietnamese spring rolls, which my friends and I make for fun :)
- one package “spring rolls skin” (the brand we use is “banh trang” and a very distinctive clear packaging with red label and makes around 20 spring rolls)
- cabbage leaves
- mint leaves
- carrots
- cilantro
- rice vermicelli noodles
- shrimp or chicken or beef or pork (aka meats/seafood)
— optional: some type of vegetable oil, cooking wine, soy sauce, sugar, chopped garlic, salt, lime juice, honey, black pepper,
— even more optional: minced ginger, chopped onion
- optional: sauce (e.g. peanut sauce)
- large (big enough to dip an entire spring roll skin into) bowl of clean, drinkable water
equipment:
- stove
- pot/wok (if you have meats/seafood)
— something to safely stir the meats/seafood with (like a spatula)
- large bowl for water
- plates/bowls for vegetables and meats/seafoods
every single ingredient, in my opinion, is “optional” or “replaceable” after the spring rolls skin :) that means, if you don’t like cabbage, don’t put in cabbage or replace it with lettuce, or if you don’t eat meat/seafood, simply leave it out, or if you prefer a different type of noodles, go ahead and try it, etc. (we tend to toss in whatever’s in our fridge and will taste good together, tbh.)
the skin is the only ingredient that’s not really negotiable as I don’t know of a replacement for it, and it’s what holds all the ingredients together… (actually, I suppose you could eat them without the skin, the same way you can now eat like “burrito-less burritos” or “bread-less sandwiches” in fast food restaurants. but I’m not exactly sure that qualifies as a spring roll then; rather, it seems like a salad with possibly some meats/seafood/noodles on top. you could try it, though?)
I saw in the original post that there were some food preferences/dietary restrictions and I completely understand as I am subject to many of those persnickety thingers myself. I try very hard to offer restriction-aware options when I am in charge of catering/restaurant selection/etc. o: so I selected this recipe bc it’s so adaptable to almost anyone’s tastes.
specifics:
myla and feyani - please feel free to leave out any meats/seafoods as desired
firkasa - there is no dairy and it is fairly mild in taste (the meats/seafoods only have bolder taste if cooked in a way other than simply boiling, and sauce is optional) [I’m lactose intolerant and also dislike foods that are rich or strong in flavors so hopefully this passes for you too!]
amaterasu and prose - this recipe as-is does not contain eggplants or tomatoes. while those can be added if the eater wants them or chooses to replace current ingredients with them, none of my friends or I put them in. as for onions, if you cook the meat exactly the way my friends did, then there will be a little bit of onion chopped very small; otherwise, no onions.
juney - due to my uncertainty about the parameters, I will note there is only the single reference to white wine vinegar in my friends’ homemade sauce but that was extra-super optional and in fact was only added because it was the only vinegar we had on hand. also because my friends like to experiment.
- cooking time: if no meats/seafood or noodles, no cooking time, you can literally sit down with some veggies and the skin and a bowl of water and start eating right away. otherwise, the cooking time is however long it takes you to cook the meats/seafood or noodles.
- meats/seafood:
you can simply boil them (no pinkness visible)! or cook them in any other simple fashion, such as lemon-butter-garlic, cooking in soy sauce for a little bit, salt and pepper, etc.
for our creation this evening, we did the following (see the chicken and shrimp in the photos):
1. flip through all of the chicken pieces in the pan so all of them have a bit of oil on at least a few sides and there aren’t any completely raw pieces
2. add cooking wine (and water if not enough cooking wine to submerge all of the chicken)
3. turn down the burner’s power by roughly 25%
4. put the lid on the pan for a few minutes for the chicken to steam/boil a bit in the cooking wine
5. right before the chicken is completely cooked, take off the lid and take out the chicken
drain the remaining liquid in the pan
6. add oil to the pan again
7. put the fire back onto full strength
8. add frozen shrimp
9. add cooking wine again
10. let the shrimp simmer in the wine with the lid on for a few minutes (add water if you don’t have enough cooking wine to cover the shrimp) but keep the fire on full power
11. when the shrimp are almost completely cooked, add the chicken back into the pan
12. add soy sauce (about two ounces as a very rough estimation)
13. add a little bit of sugar (roughly 2 tsp, this was all estimated)
14. mix thoroughly
15. add minced ginger (1 in.) and garlic (2 cloves)
16. after ginger and garlic have been thoroughly incorporated, add the diced onions
17. sautee until the meat looks completely cooked
18. taste test to see if more salt needs to be added
19. strain out the chicken and shrimp
20. turn the fire lower (about halfway) with the remaining sauce in the pan
21. add two more tsp of sugar and mix it in slowly
22. add half a medium-sized lime’s juice to the sauce
23. add 2 tbsp of honey and mix slowly
24. add a few slices of minced ginger
25. add a bit more honey to taste
26. add a few shakes of black pepper powder and remove from heat
- noodles:
boil until desired softness/texture (if you’re using rice vermicelli, it should still be slightly sticky and chewy but also soft and completely white/opaque rather than it’s grey, dry, brittle, semi-translucent original state)
- vegetables:
tear any leaves up so they’re bite-sized (cabbage can be about palm-sized if it’s soft), and make sure any harder vegetables (e.g. carrots) are either sliced into small chunks or thin peels/slices
- sauce:
this one’s difficult for me to explain. traditionally, I think a peanut sauce is used, or even a hoisin or soy/vinegar sauce. however, I don’t use condiments/most sauces so I am completely unsure. my roommates whipped something up using garlic, soy sauce, white wine vinegar, honey, and lime, but it baffled me.
- actually eating:
dip an entire spring roll skin into the bowl of water, lay it out on a plate, grab a selection of your preferred vegetables and/or meats/seafood and/or noodles, place them carefully in the middle of the spring roll (there should not be more than about two-three fingers’ wide amount of food items), then fold over one of the longer sides of the skin, fold up one of the shorter sides, fold the other longer side, and fold up the final shorter side. if you like sauces - either you can sprinkle some before you start folding or dip it after you’re done folding. then eat.
for the hungry mc resident, look for the following ingredients!
- skin: lily pads, fresh
- vegetable options: assorted mushrooms*, fragrant flora**, pumpkin trio
- herb options: lucky clover, white/red/black rose petals
- meat/seafood options: assorted fish***
- noodle options: driftwood****
*please consult bruc on seasonal options
**be very careful collecting this item as side effects include unwanted sleep fits
***please stick to the fish…remember, pets are Friends Not Food
****please do not actually eat driftwood unless your physician has added this to your daily recommended diet. even if you boil it. especially if you boil it. a recent outbreak of “drifting” has been reported after driftwood was consumed along with select mushroooms and items. therefore, we cannot be held liable for any resident’s decision to eat driftwood.
once you have collected these ingredients, you can prepare the food with the help of a recipe bottle.
best of luck, it should only take you the rest of your life a little while to hunt one down!
note: not pictured in above two photos is our giant bowl for dipping the skins into, but the mouth of it was almost the same size as the plate holding our chicken and shrimp. also, we were lazy and did not shred the mint leaves into tiny bits, but you might prefer smaller chunks for herbs based on taste.
“top” layer* of my 4th spring roll
*I tend to put ingredients in my spring rolls in “layers” (so meats/seafood on the bottom, then veggies, then noodles on top) so depending on what side I place it on, you see a different layer of the roll
“bottom” layer of my 4th spring roll
EDIT: for whatever reason, my proof didn’t work right the first time! sorry eAe;; perils of uploading photos online… hopefully it’s still counted as submitted on time ;o;
EDIT2: totally forgot to add that I had selected this recipe bc it’s very adaptable! I had a “to clarify” section but it was a bit hard to follow, so I gave it its own “food preference” section to help the judges better understand :)